Replacing Old Artificial Grass
One of our customers recently purchased artificial grass from us for a DIY installation. They had generously agreed to take photos of the install and take part in a case study for us.
The area was only 12m2 and was almost exactly 4 metres by 3 metres. The customer therefore simply purchased a 4m x 3m single piece of grass. The customer had purchased our Empire 45mm artificial grass. The accessories included 20 fixing pins and weed membrane.

Why did you purchase the Artificial Grass?
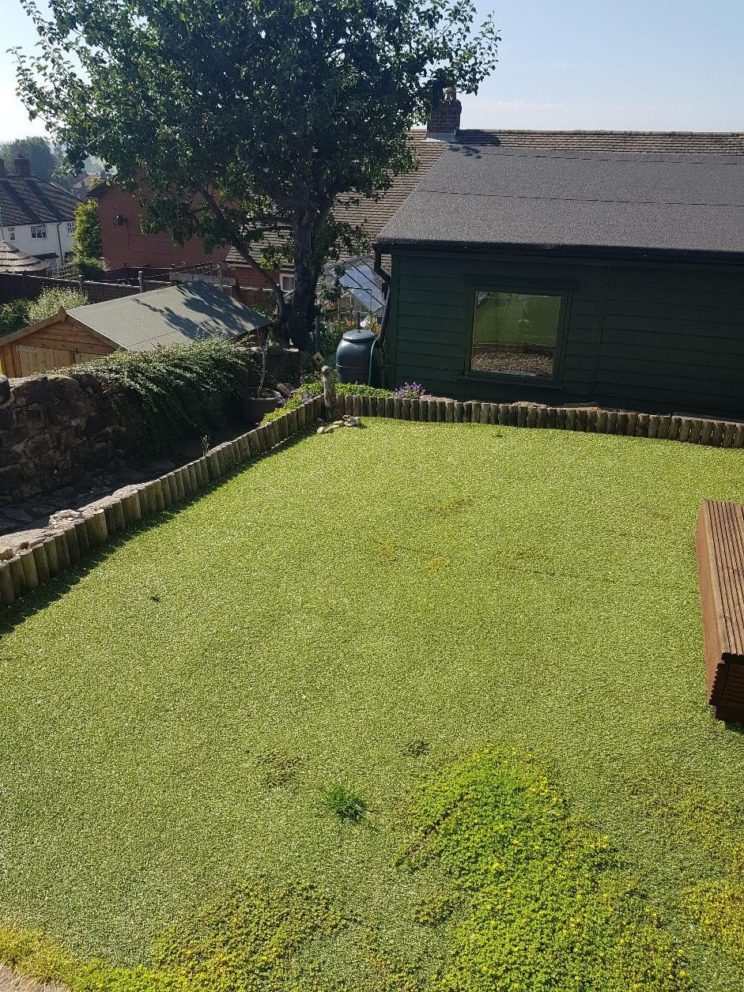
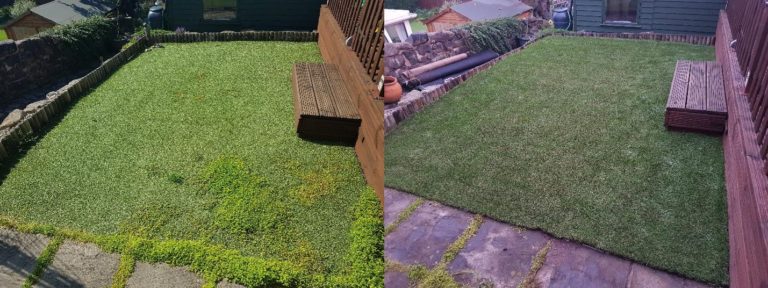
We recently moved into the property and the original artificial grass was already there. However, it was really old and it hadn’t been installed very well as there were a number of weeds growing through it. Also, the ground underneath it was quite bumpy and it was obvious that no one had ever tried to level it out.
We also didn’t want to purchase a lawn mower. Firstly this can be expensive in itself, but we also didn’t fancy mowing it every 2 weeks during summer. In addition, the property is on a number of levels and it would have been really awkward lifting the mower up and down and around the different levels of the garden.
How did the actual installation process go?
Step 1) Ripping Up the Old Artificial Grass
This is when we discovered some signs that the original artificial grass wasn’t installed very well. Although we had bought a 4 metre wide roll, the original was actually 2 pieces of 2 metre long rolls. This meant that there was an unnecessary join down the middle. On top of the fact that this was unnecessary, it wasn’t actually joined together very well and easily came apart.
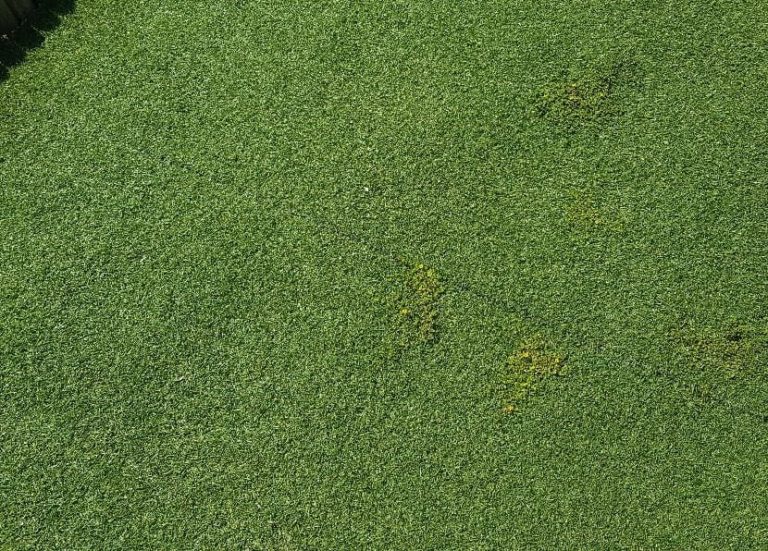
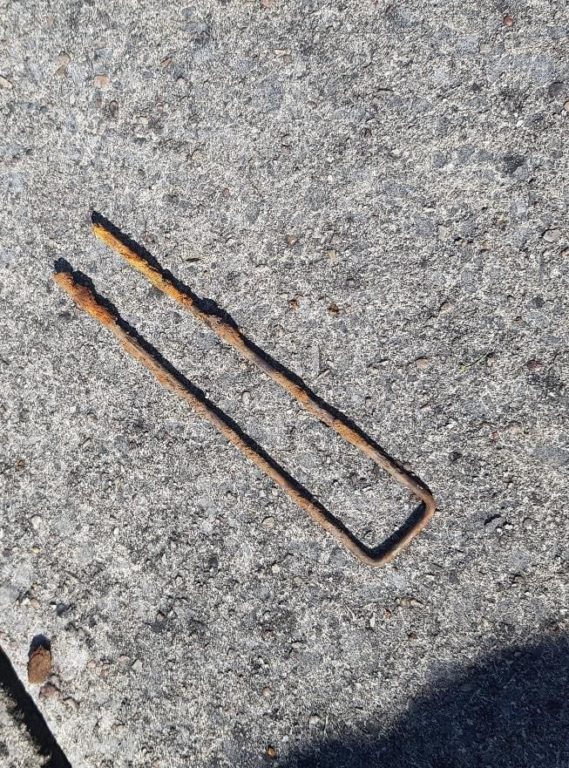
There were also a few gaps in the weed membrane which probably explains the weeds. The previous owners had also used cheap non-galvanised fixing pins that were rusting away.
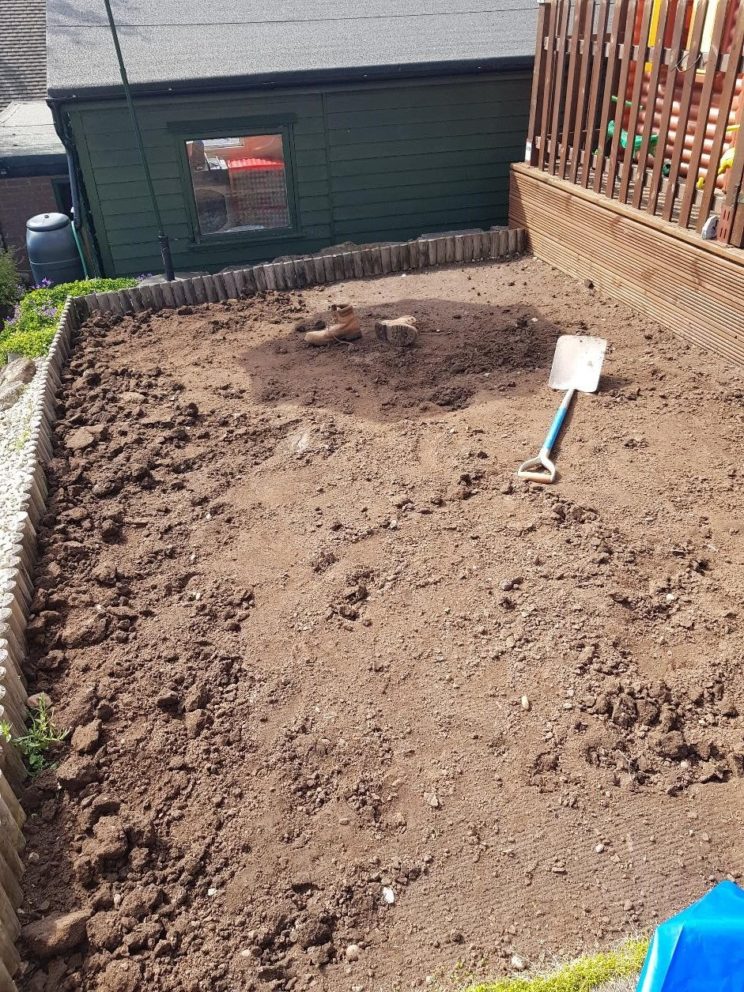
Step 2) Levelling the Surface
This part of the process was desperately needed. There were bumps everywhere and the whole area dipped in one corner. Unfortunately, when I went to dig the area up to loosen the soil, I found that it was rock solid. I would throw the shovel into the ground and it only went in about a centimetre. I would stamp on the back of the shovel with no effect.
This meant that I had to use the sharp end of a large hammer to churn up the whole area. This was very very hard work and it was one of the hottest days of the year.
Nomow Top Tip: If you need to churn up some soil and can’t afford to hire equipment, use a hose to water the area to soften it up.
Once the area was loosened up, I was able to move the earth around to create a general levelling.
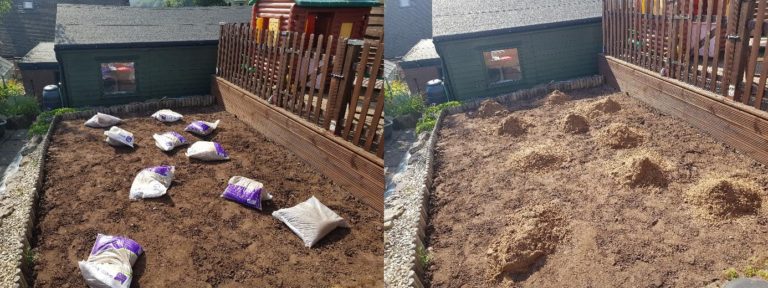
Step 3) Laying the Sharp Sand
I bought 10 bags of sharp sand from my local builder’s merchant. It was a lot cheaper than I expected but it was also a lot heavier than I expected.
I opened the bags evenly around the area and used a rake to spread it out. The sharp sand was perfect for evening out lumps and bumps in the soil below. However, I still needed to compact the sand a bit. Again I could have, but didn’t want to, hire a whacker plate. Instead, I used the base of a parasol and repeatedly lifted and slammed it into the ground. This worked but again, it was labour intensive.
Finally I used a long straight piece of timber to smooth out the area to near perfection.
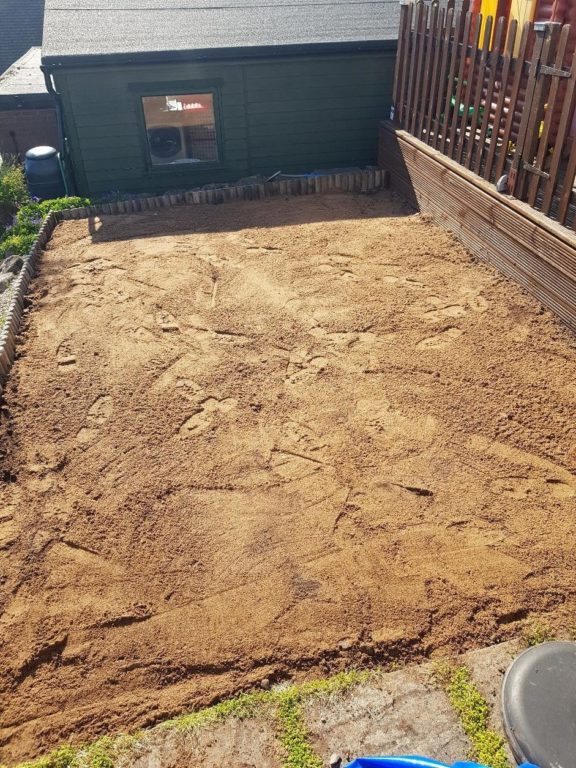
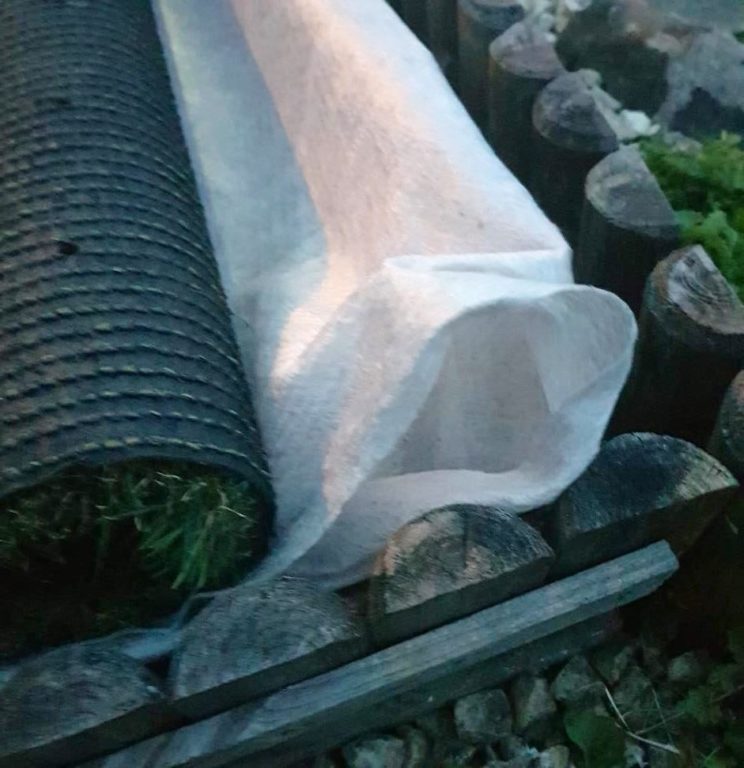
Step 4) Weed membrane
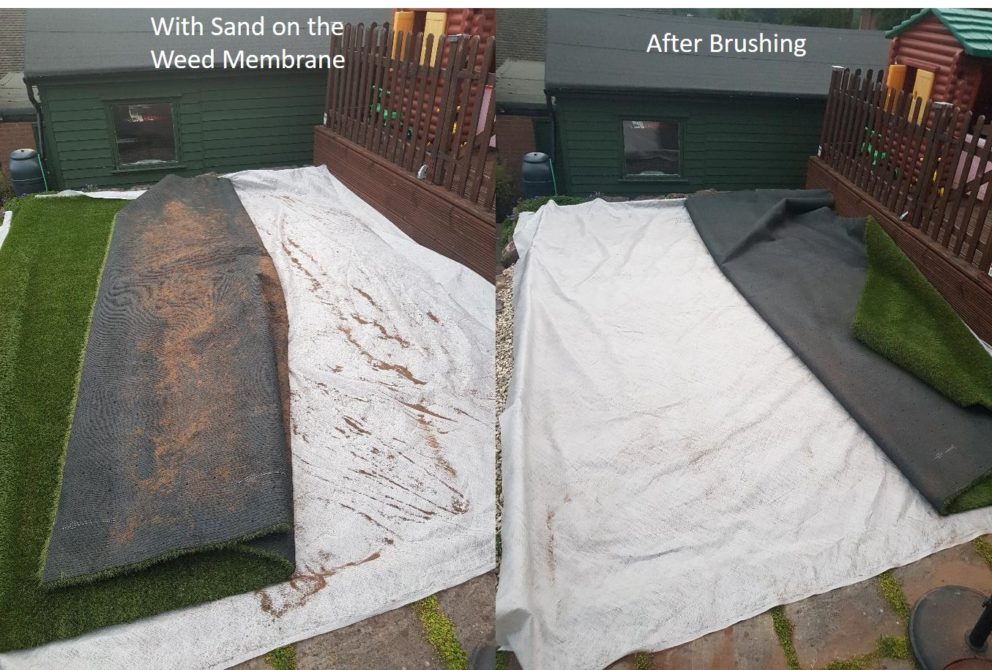
Foolishly, I opened up the grass on the sand before I had laid the weed membrane. Not only did this mean that it was harder to move around once open, but it also meant that I had a lot of sand stuck to the underbelly of the grass.
When I laid the weed membrane out and placed the grass on top, I noticed that there was a substantial amount of sand that was now on top of the weed membrane. This meant that I effectively had; soil, under sand, under weed membrane, under sand, under artificial grass. Rendering the weed membrane a little bit pointless.
So I then set about brushing and cleaning the sand off before I could continue. This rookie mistake added quite a bit of time onto something that should have been very simple.
Nomow Top Tip; Weeds can grow almost anywhere. The risk of weeds growing is increased if there is a lot of dirt and sand on top of the weed membrane. The customer was correct in spending the extra time to make sure this was as clean as possible.
Step 5) Positioning the Grass
The next stage was pretty simple and easy. Once everything was clean I simply manoeuvred the grass round like a large rug until it was in the perfect position.
Step 6) Cutting the Perimeter
Initially, I thought I would be clever and fold the excess weed membrane under the grass. Just because this would be quick and I could easily resize it. However, this proved to be another waste of time as it created a small, but noticeable lift around the perimeter. So I then cut the weed membrane, like Nomow had originally recommended.
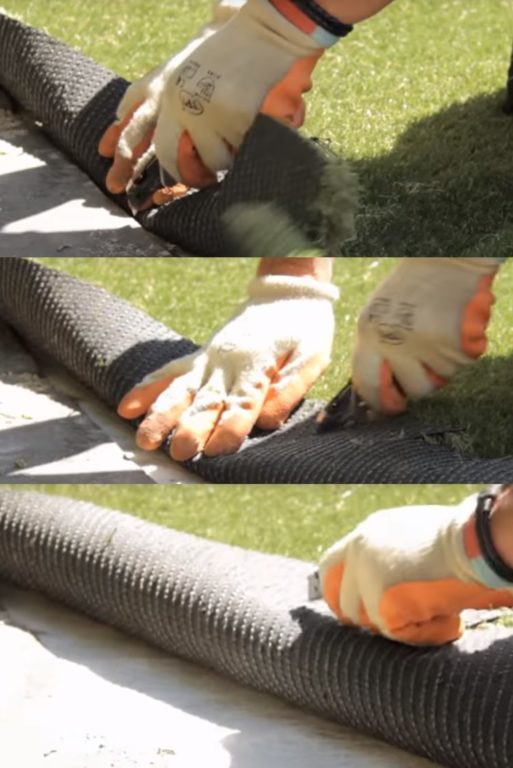
Cutting the grass to size to fit the edge was harder than expected. One reason for this was because my edging wasn’t exactly straight, and therefore I couldn’t just cut the edge in a straight line. Instead, I had to continuously measure the distance from the edge to where I needed to cut the grass. I also used my own technique for doing this which wasn’t very good. I later discovered that Nomow have a recommended way of doing this that looked a lot easier.
Nomow Top Tip: Cutting from the back, trim the grass neatly, near to size. Final trimming should be done by folding the grass back on itself and slitting the backing at 90 degrees to the edge, every 50mm, to give you a guideline to cut to.
Step 7) Fixing
The sun was going down, I had worked hard all day and it was looking good. I spaced out the fixing pins evenly around the perimeter about one meter apart. Finally, I hammered them in and I was finished.
What were the learning points?
The main thing I learned was that this work was very very physical. It can be classed as a DIY project but it’s not like putting up a shelf or wallpapering. Anyone can do it, but only if you are physically capable. Simply moving a 4 metre long roll around is difficult in itself. I wouldn’t attempt this if you have back issues or other physical problems.
I also learned that 90% of the work is groundwork. The actual laying of the artificial grass is quite quick.
I also chose not to hire equipment like Wacker plates and turf cutters. This did make it cheaper but really did ramp up the effort needed. I suppose this is quite good because it means that everyone can choose the balance between costs and physical work. Everyone can choose between simply using Nomow’s Installation services, through to DIY with hired equipment, through to doing everything yourself but with the most work.
Another thing I learned is that I would probably try to listen to Nomow’s advice more. I found myself making mistakes that made everything take longer, which could have been avoided if I’d used Nomow’s techniques.
What was harder than expected?
Groundwork. Simply churning up the soil, moving it around and dealing with heavy things was physically hard work.
What was easier than expected?
Everything after the groundwork. Once the ground was level and flat, the actual installation of the artificial grass was good fun and very satisfying.
Other Case Studies